Neewer - Flash Trigger con 4 radio canali wireless e 2 ricevitori descrizione
:
Descrizione prodotto
Colore:Blitz Auslöser + 2 Empfänger
Adatto a
Nikon SB-900, SB-800, SB-600, SB-28, SB-27, SB-26, SB-25, SB-24;
Canon 580EX II, 580EX, 550EX, 540EZ, 520EZ, 430EX/EXII, 430EZ, 420EX, 420EZ, 380EX;
Pentax AF-540 FGZ, AF-360 FGZ, AF-400 FT, AF-240 FT;
Olympus FL-50, FL36;
Sigma EF-500 DG Super, EF-500 DG ST, EF-430;
Sunpak Auto 2000DZ, 622 Pro, 433AF, 433D, 383, 355AFm 344D, 333D;
Vivitar 285HV (vecchio Vivitar 285/283 funziona solo con PC sync)
Altri modelli con la tensione di 12V o inferiore;
Lavora con le unità flash che hanno hotshoe universale, come quelle di Nikon, Olympus, Pentax, Sigma (TRANNE Minolta/Sony, in quanto utilizzano hotshoe particolare).
Come utilizzare:
Accertarsi che i selettori di canale del trasmettitore e del ricevitore sono tutti nella stessa posizione.
Inserire il piedino hotshoe del flash nella slitta hotshoe del ricevitore.
Premere il tasto di prova sul trasmettitore.
Inserire il piedino hotshoe del trasmettitore nella slitta hotshoe della fotocamera (nel caso che la fotocamera non dispone di slitta hotshoe, collegare il trasmettitore tramite il cavo di sincronizzazione PC).
Così i dispositivi sono pronti per le riprese.
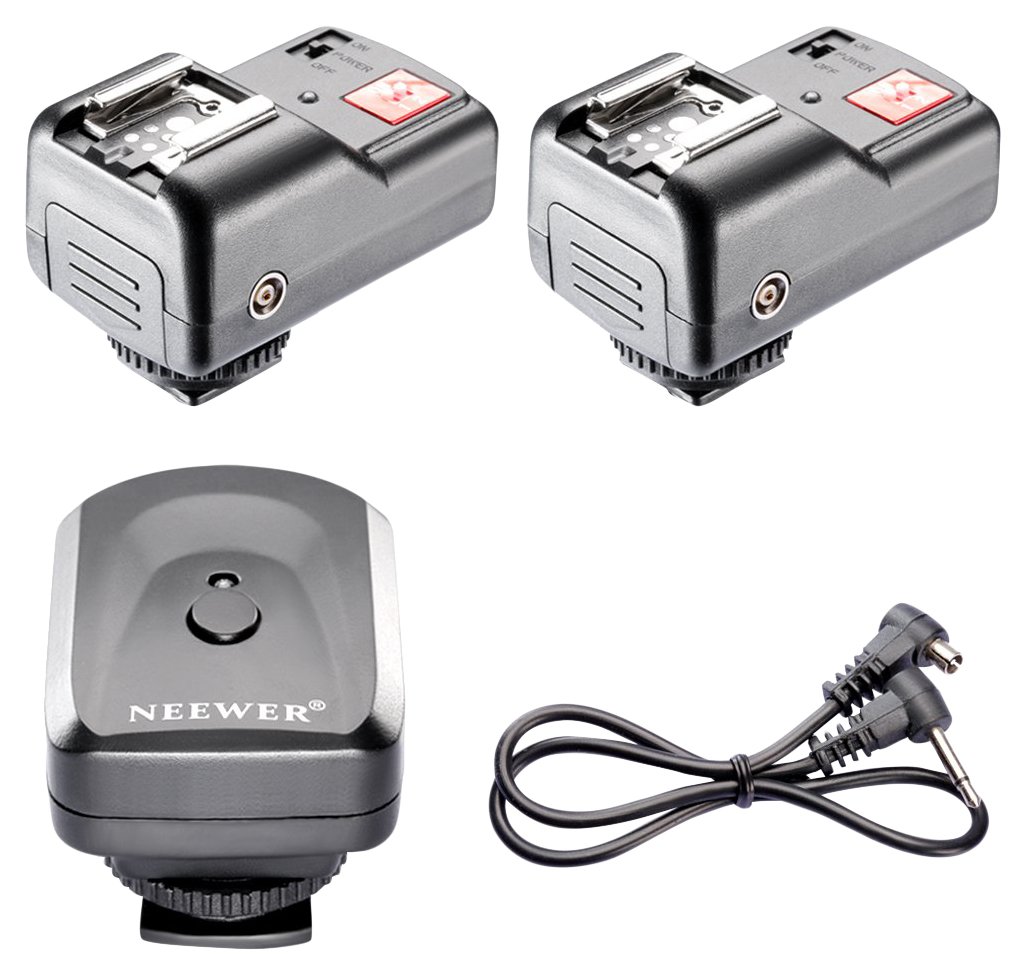
In pacchetto:
1* Trasmettitore da 4 canali
2* Ricevitore
1* Cavo di sincronizzazione PC
Neewer - Flash Trigger con 4 radio canali wireless e 2 ricevitori specificazione
:
Distanza operativa all'aperto: >30M
Distanza operativa al chiuso: >10M
Frequenza: FM 433Mhz; Canale di frequenza: 4
Velocità di sincronizzazione all'aperto: massimo 1/500s
Velocità di sincronizzazione al chiuso: massimo 1/250s
Neewer - Flash Trigger con 4 radio canali wireless e 2 ricevitori Recensioni
:
Spedizione un pò confusionale ma cmq in Breve Tempo,l'unica pecca è la difficoltà ad aprire lo sportellino delle Batterie,ho provato ad usarli per vedere se funzionavano e fanno il loro dovere,le Batterie del Flash devono essere Super Buone e di Marca tipo Duracell altrimenti sembra che non funzioni il Trigger..ne complesso soddisfatto visto il prezzo..
Buon rapporto qualità prezzo compatibile con flash Nikon e flash da studio sembrano anche abbastanza solidi. Un solo cavo in dotazione
> PREPARATION: Install 2 AAA batteries (not included) in each of the receivers. Turn the receivers on. The button on the top of the sender can be used to send a signal to the receivers to test the set. A red LED will flash on the sender unit when a signal is sent, and red LEDs on the receivers will flash when it is received. If you don't plan to take photos soon, then turn the receivers off to conserve the battery charge.
> INSTALLATION: Slide the sender into your camera's hotshoe (long part facing forward, be sure it is all-the-way), tighten. Slide your flash units into the receivers (long part facing forward).
> You MUST have a hot shoe on your camera for the sender unit (see below for possible exceptions). There is a 12" sync cord included, nominally for older cameras without hot shoes---but I've never seen a modern digital camera with this old-fashion type of plug-in flash connector.
> CHANNELS: The frequency settings (aka "channels", via DIP switches) have to match, but the set comes with matched settings. You don't have to mess with the DIP switches unless you have interference or cross-talk with other devices.
> OPERATION: The Universal model wireless trigger does not support TTL flash auto-exposure, even if your flash unit does. You either have to use the built-in flash auto-exposure mode (if available on your flash unit), or use your flash unit manually.
>>> RECOMMENDATION: I recommend manual flash units. Manual flash units actually give you more control of the flash illumination level, and they cost about 1/10th the price of equivalent TTL flash units. Yes, exposure with a manual flash unit is trial-and-error---but, with experience, it usually takes only 1 or 2 tries to get a good exposure, and exposure adjustment is very quick and easy. TTL auto-exposure flash is rarely perfect on the first exposure and adjusting auto flash exposure is usually a tiresome multi-step process, and even then generally does not yield the best results.
> SYNC OPTIONS: Set the flash on "M". Many manual flash units can work as slaves, meaning that they have a photocell which will trigger the flash unit in response to a main flash. The slave settings are identified as "S1", "S2" etc. (sync on first flash, sync on second flash etc.), but don't apply when you have a physical or wireless flash trigger connection. Setting such units to "M" prevents accidental triggering of the units.
> CAMERA SETTINGS: Since the Universal model wireless trigger does not support TTL flash auto-exposure, auto-exposure modes of your camera will not usually produce the best photos (albeit there are exceptions). HIGHLY RECOMMENDED: set your camera on "manual" AND manually set the ISO to a low number. Otherwise your camera will automatically hike up the ISO which will degrade the image..
>>> EXAMPLE: I use a Neewer TT560 Flash Speedlite for Canon Nikon Sony Panasonic Olympus Fujifilm Pentax Sigma Minolta Leica and Other SLR Digital SLR Film SLR Cameras and Digital Cameras with single-contact Hot Shoe for my main flash and one or two PLR Studio Series Pro Slave Flash Includes Mounting Bracket For The Panasonic Lumx DMC-FZ200, FZ150, FZ100, FZ70, FZ60, FZ40, FZ45, FZ47, FZ48 Digital Cameras flash units for fill. For closeup/macro photography, I usually set my camera to full manual operation, my macrolens at f22, the ISO at 200, my Neewer TT560 at maximum flash output, and then simply hold the main flash closer or farther away to vary the flash intensity.*** It I need more light, I adjust the ISO to 400 or 800 rather than hold the flash too close to the subject.
>> SYNC SPEED: The sync speed of the wireless trigger is up to about 1/200th second. You can use lower shutter speeds to let in more environmental light, to reduce harsh shadows or to adjust the exposure of the background. With my camera set to "manual", I often use shutter speeds down to several seconds when photographing stationary objects (such as flowers) with flash against a natural background.
> AT THE END OF A SHOOT: Don't forget to turn the receivers off when you are finished in order to minimize battery drain.
> REENFORCEMENT: The plastic hot shoes on the receivers are not as strong as they could be. If you use a heavy flash unit and mount it on a cold shoe bracket or stand, I suggest installing LimoStudio 2x Mini Black Double Screw Angle 1/4" Hot Shoe Mount Adapter Holder, AGG1451 on the bottom of the receivers.
> SYNC CORD INSTEAD (?): For simple setups, a direct flash sync cord may be a better solution. (For example, NEEWER® TTL Off-camera Flash Hotshoe Connector Cord for Olympus Panasonic Camera Speedlite). Such cords support TTL flash auto-exposure, and burst flash (if your camera and flash unit support these); you don't have to worry about radio interference, you may be able to use higher shutter speeds to freeze moving objects, and a flash cord needs no batteries to go dead, nor to remember to turn off.
> WIRELESS REMOTE (?): Not mentioned anywhere I've seen, you might be able to use the sender as a wireless remote shutter release if you can match the frequency (aka channel) with your camera. Conversely, it is possible that your camera has a built-in sender which might be compatible with the receivers (see your camera manual), if you can match the frequency. My owner's manual implies such a function, but provides no details. In either case, you might have better luck with the 16 frequency model than this 4 frequency model.
>BATTERIES: I recommend normal alkaline batteries for the receivers. A single set of normal alkalines has lasted me for perhaps 10,000 photos so far. You can use rechargeables, but they will loose their charge over a few months even if you don't use the units. At the other extreme you can use lithium batteries, which could last a decade---if you don't forget to turn off the receivers. It is easy to forget, and an expensive mistake if you are using lithiums. I use rechargeables in my flash units and recharge them after every photo session
> TOUBLESHOOTING test using each step in the following order:
1) Test fire using the button on the sender, if the red LED on the sender does not flash, then the A23 battery in the sender is probably bad---but that is unlikely, and requires disassembly of the sender to change the battery or clean the contacts.
2) Be sure the receivers are "on". Test fire using the button on the sender. If the red LED on one or both of the receivers does not flash, then the batteries in the corresponding receiver are dead or the contacts are dirty. You can clean the contacts (of both the batteries and in the receives) with a cotton cloth and isopropyl alcohol .
3) Test fire using your camera's shutter release. If the red LED on the sender does not flash, then the sender is probably not correctly seated on in your camera's hotshoe, loosen it, slide it off, then all the way back on and tighten. Be sure that it is facing long end forward. If you think that it was properly seated, then cleaning the contacts is a good idea.
4) Install flash units in the receivers and turn the flash units on. Test fire by "taking a picture", if the flash unit does not fire then the batteries in the corresponding flash units are dead or the contacts are dirty.
5) If a flash unit seems to work intermittently, then you are probably not waiting long enough for the flash unit to recharge. Do not depend on the flash units' ready lights---in some flash units, even though the ready light will glow, the unit will not fire if the batteries are weak---instead, try fresh batteries. It is good general practice to slowly count to 10 after the ready light comes one before firing a flash---because the ready light comes on long before the capacitor is fully charged.
***Note: It is generally best to hold the flash unit as far away from your subject as is convenient (even if you have to boost the ISO a step or two), because that way you get the maximum "depth of illumination". You also get more of a "point source" illumination which creates sharper shadows and therefore more detail and sharpness. (The sun on a clear day is the ultimate "point source" which is very hard to duplicate with flash illumination). For closeups (including portraits), to get this good depth-of-illumination, a moderate telephoto lens (or a zoom lens at the corresponding zoom) usually works best.
> Click on “Stoney” just below the product title to see my other reviews, or leave a comment to ask questions.
I bought this to use with two Neewer E-TTL Speedlites also purchased from Amazon. They are fantastic, so naturally I went with this Neewer wireless trigger. Neewers Hit or Miss nature is evident here. These triggers are of very poor build quality and function as they appear. The main issue is that the way they trigger the Speedlites causes a full power flash every time - reguardless of the setting on the speedlite. This makes it useless for almost all uses as I rarly want the flash at full 1/1 power. So yes, it works, but it doesn't work for me or most uses. Perhaps it's different with other speedlite models but if you have a digitally controlled speedlite from Neewer - dony buy this.
Great deal. I haven't had a single issue with it. I decided to purchase this after having being unsuccessful with the Bowboystudio SYK-3. This product did exactly what i needed it to and at a great price. Its easy to set up and small enough to store in any medium-sized storage bag. The only gripe i have is that i hadn't purchased this product first.
Oh, and for anybody wondering about range, this product will flash even out of line of sight. I couldn't see any reason you would want your flash in another room while you're taking a picture, but its nice to know that you can count on it going off no mater its location.
It should be noted that for this review I bough the generic one, designed for all, as it had the lower price than the Canon specific model (I don't know why Amazon lists all product reviews together, doesn't make sense, hard to tease out which versions work best). I bought two of these for use with my Canon EOS 6D and two supplemental Neewer TT560 speedlites (which I love). The first day I used them, they worked 95% of the time. I actually did a test in my long backyard to see how far they would transmit and I got pretty close to 100 feet. Problem is, they never really worked after that. On occasion they would work about 5% of the time. I even replaced batteries- still no go. They would work sometimes if you pressed it really close to the unit. But 95% of the time they would not work. Even if they worked 95% of the time, that's still not quite good enough for a pro photographer, and these things were averaging less than 5% of the time, so I couldn't offer the functionality of wireless flashes to my clients as I had anticipated. Sucks because I was really looking forward to being able to use them. When I played with them today they didn't work at all, until I used my legitimate Canon 430EX, which I realize has additional prongs on the bottom (different than the Neewer TT560 flash unit), when I put the Canon flash on the unit then it worked 75% of the time, but only when within 5 feet of the trigger. So this is a no go. I'm going to try the Altura Photo model ones and see how they work, they get better reviews.
Neewer 3pz Batteria 900mAh Ricaricabile per Fotocamera d’Azione con Caricabatterie Doppio a USB per AKASO Lightdow Vtin Cymas DBPOWER APEMAN Vikeepro Canany Wimius Campark SOOCOO SJCAM SJ4000 SJ7000
Neewer 3pz Batteria 900mAh Ricaricabile per Fotocamera d’Azione con Caricabatterie Doppio a USB per AKASO Lightdow Vtin Cymas DBPOWER APEMAN Vikeepro Canany Wimius Campark SOOCOO SJCAM SJ4000 SJ7000 descrizione
:
Descrizione prodotto
N.B. è necessario usare una spina 5V/2A per caricare 2 batterie nello stesso tempo, altrimenti è possibile alimentare solo 1 batteria alla volta.
Descrizione:
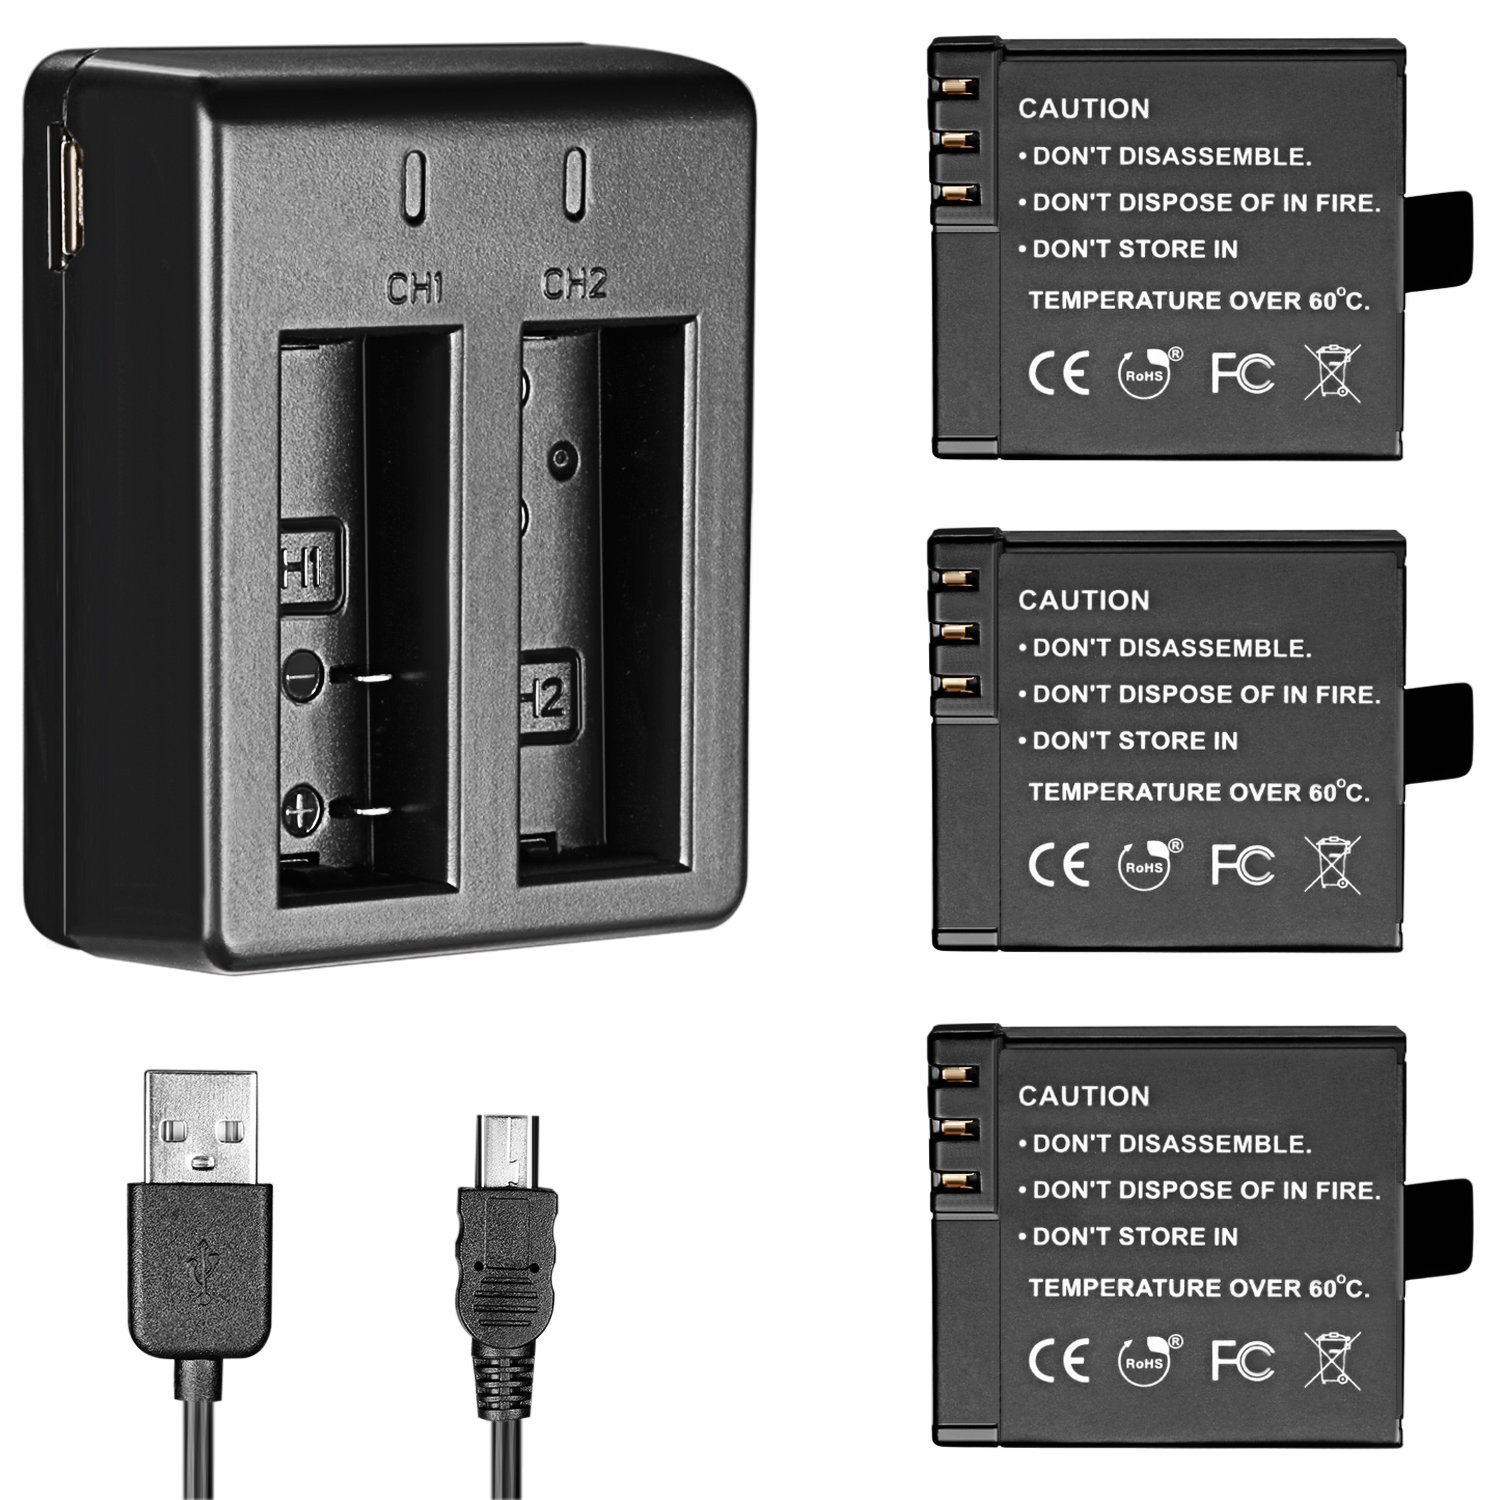
Ci sono 3 batterie 900mAh 3,7V 3,3W, 1 caricabatterie doppio a USB e 1 cavo USB nel pacchetto.
Compatibilità: AKASO/Vtin/Cymas/DBPOWER/APEMAN/Lightdow/Canany/Wimius/ABLEGRID/Vikeepro/GT ROAD 4K/Campark/SOOCOO//ELECam/EKEN/Chinaface/Gizcam/Pictek/Alolli/dOvOb/ODRVM/Aurosports/JUNING/OnLyee/AEDILYS 4K/Yuntab/homkm/Nexgadget Action Camera/ Floureon/ThiEYE/CCbetter/TOPGEEK/Review XP 4K/iGank 4K/HEIHEI/OnLyee/B - sea/TecTecTec/exuby/Anbero/Aokon/SJCAM SJ4000 SJ5000 serie & SJ7000/ ActionSavvy/Legazone action camera
Batteria
Le batterie possono essere alimentate via caricatore USB da muro, caricatore da auto, laptop o Power Bank. È possibile utilizzare qualsiasi sorgente elettrica a USB ovunque.
Sostituzione: SJ4000B a litio ricaricabile
Tensione: 3,7V
Capacità: 900mAh
Caricabatterie Doppio a USB
È portatile e conveniente da usare. L'indicatore rosso mostra il processo di carica. Invece, quando il verde è acceso, segna la batteria ben caricata, oppure lo slot vuoto.
Permette di collegare il caricabatterie a USB tramite il cavo USB in dotazione, alternativamente si può usare il cavo Micro USB in possesso.
Modello: NW-4000B
Input: 5V/2A
Output: 4.2V/0,75A (x2)
In pacchetto:
3* Batteria
1* Caricabatterie Doppio a USB
1* Cavo USB
Neewer 3pz Batteria 900mAh Ricaricabile per Fotocamera d’Azione con Caricabatterie Doppio a USB per AKASO Lightdow Vtin Cymas DBPOWER APEMAN Vikeepro Canany Wimius Campark SOOCOO SJCAM SJ4000 SJ7000 specificazione
:
Attenzione: è necessario usare una spina 5V/2A per caricare 2 batterie nello stesso tempo, altrimenti è possibile alimentare solo 1 batteria alla volta.
Ci sono 3 batterie 900mAh 3,7V 3,3W, 1 caricabatterie doppio a USB e 1 cavo USB nel pacchetto.
Compatibilità: AKASO/Vtin/Cymas/DBPOWER/APEMAN/Lightdow/Canany/Wimius/ABLEGRID/Vikeepro/GT ROAD 4K/Campark/SOOCOO//ELECam/EKEN/Chinaface/Gizcam/Pictek/Alolli/dOvOb/ODRVM/Aurosports/JUNING/OnLyee/AEDILYS 4K/Yuntab/homkm/Nexgadget Action Camera/ Floureon/ThiEYE/CCbetter/TOPGEEK/Review XP 4K/iGank 4K/HEIHEI/OnLyee/B - sea/TecTecTec/exuby/Anbero/Aokon/SJCAM SJ4000 SJ5000 serie & SJ7000/ ActionSavvy/Legazone action camera
Le batterie possono essere alimentate via caricatore USB da muro, caricatore da auto, laptop o Power Bank. È possibile utilizzare qualsiasi sorgente elettrica a USB ovunque. L'indicatore rosso mostra il processo di carica. Invece, quando il verde è acceso, segna la batteria ben caricata, oppure lo slot vuoto.
Permette di collegare il caricabatterie a USB tramite il cavo USB in dotazione, alternativamente si può usare il cavo Micro USB in possesso.
Neewer 3pz Batteria 900mAh Ricaricabile per Fotocamera d’Azione con Caricabatterie Doppio a USB per AKASO Lightdow Vtin Cymas DBPOWER APEMAN Vikeepro Canany Wimius Campark SOOCOO SJCAM SJ4000 SJ7000 Recensioni
:
Amazon impeccabile come sempre.....Carica più velocemente della telecamera, usate a rotazione le 3 batterie, con l'originale avete minimo 400 minuti di funzinamento
I have given it one star for now but will change that if I get this resolved. But the charging cable they provided is not the right one for the product. The USB connection is not the same as the USB connection on the battery charger
******* UPDATE ********
I have changed my review to 5 stars because after I wrote this, I realized that there are Different USB connection on 2 sides of the charger. So it came with the right cable and works great
No comments:
Post a Comment